Tracking Panel
With the Multi Time Tracker you can automatically track all your work logs in one session. On this page we will go over all the features of the tracker.
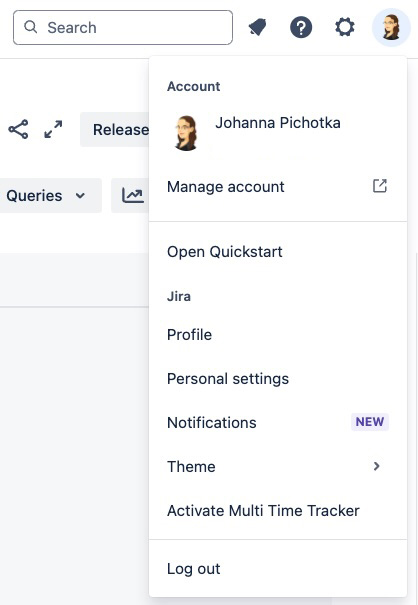
Activate the tracker
To activate the Multi Time Tracker navigate to the user menu in the upper right corner. ‘Activate Multi Time Tracker’ will be one of the options shown.
The Multi Time Tracker will now appear as a side panel on the right side of the issue view. In case you can’t see it, try reloading the page.
Add issues to the tracker
There are two different ways to add issues to your tracker:
1.Manually add your issues.
To manually add your issues navigate to the side panel in the issue view and click on the button ‘Add issue to tracker’. Then you can start searching for your issue and add it to the tracker.
2.Activate Autostart to automatically add and track your issues.
To enable automatic time tracking, navigate to the side panel and toggle on ‘Auto Tracking’. When enabled every issue you open or click on will be added to the tracker list.
If you click on an issue that is already on your list, it won’t appear twice but time will be added to the already existing track in the Multi Time Tracker.
Pause tracker
To pause the tracker click on the tracker next to the issue you’re currently tracking. The break will start.
You can resume tracking by clicking on the issue you want to track or the tracker next to the break time. When you use the tracker next to the break time, the tracker will resume tracking the issue your’re viewing or last issue you tracked (only when you have ‘Auto Tracking’ off).